
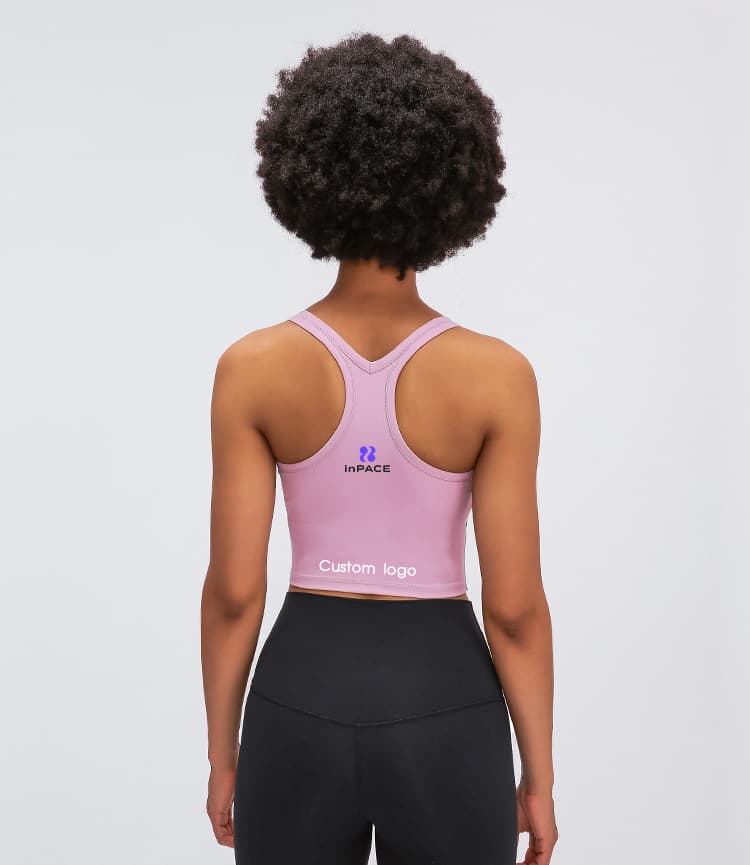
Direct answer. A barre workout apparel manufacturer brief should connect each top, bra, bottom and layer to the actual class format. Define coverage boundaries, outfit overlap, movement-review positions, fit-model records and approval evidence before sampling. A catalogue style may suggest a silhouette, but any changed fit, material, construction or coverage requires controlled factory-custom development.
This guide is for activewear brands, studio operators and buyers building apparel for barre and sculpt classes. Here, sculpt class describes a studio class context only. It does not mean that clothing changes a body, causes weight loss, improves posture or provides a medical benefit.
The commercial route discussed below is factory custom manufacturing. Existing garments are useful references for proportion and product role; they are not proof of class suitability, available stock, a fixed minimum, price or delivery date. With more than 30 years of garment-production experience and coordination across partner factories, inPACE can help a buyer turn design intent into an identifiable sample and approval record. The buyer still needs to define the class, customer, garment job and decision owner.
What should a barre workout apparel manufacturer brief define first?
Start with the session the customer will attend, not with a generic request for “barre fabric.”
Send the manufacturer:
- Class format, duration and the movement families the buyer wants reviewed.
- Whether the programme is primarily standing at the barre, mat-based, mixed studio work or a named sculpt format.
- Product roles: close top, bra, legging, short, optional skirt or warm-up layer.
- Intended fit and coverage boundaries for each role.
- Reference garments, sketches, tech packs or marked images.
- Neckline, armhole, strap, hem, waistband, rise and inseam questions.
- The intended top-to-bottom overlap at rest and during the selected sequence.
- Material handfeel, stretch, recovery, opacity and surface questions.
- Base sample size, proposed size range and identified review wearers.
- Branding, label and packing direction.
- The purpose of each sample and the person authorised to approve it.
The Yoga Wear Manufacturer guide is useful for broader supplier capability and studio-collection planning. This page is narrower: it translates barre and sculpt-class product roles, coverage, transitions and layers into a sample-review plan.
How should the class format change the apparel brief?
“Barre” is not one universal movement sequence. A class may combine standing work, arm sequences, floor work, kneeling, supine positions, stretches and transitions. A sculpt class may add light equipment or a different pace. The apparel brief should state which context the buyer is actually designing for.
| Class context | Garment questions to define | Review evidence to keep | Do not assume |
|---|---|---|---|
| Standing barre work | Top hem, waistband position, back coverage and strap path during reach, hinge and repeated lower-body positions | Front, side and back views tied to named movements | That a still standing fit approves the class |
| Mat or floor section | Neckline, armhole, side coverage, waistband and seam contact in kneeling, seated, side-lying and supine positions | Garment version, wearer, position and adjustment record | That yoga approval automatically transfers |
| Mixed sculpt class | Outfit security through standing-to-floor transitions and any buyer-selected equipment context | Sequence notes before, during and after transitions | That “high impact” or “low impact” labels settle fit |
| Arrival or warm-up layer | Layer length, opening, sleeve, pocket and relationship to the close outfit | Open, closed and removed views with the intended outfit | That the layer stays on throughout class |
The buyer or a qualified class professional should choose the movement sequence. The apparel manufacturer can observe garments and develop patterns; it should not prescribe exercise technique or claim that clothing makes a movement safe.
Which garment roles belong in the first barre capsule?
Keep the first capsule focused enough to learn from. A useful starting system often includes:
- A close top or bra whose neckline, armhole, strap path and lower edge can be reviewed.
- A high-rise legging or close studio bottom with an identified waistband and seam plan.
- A light layer only when it has a defined arrival, warm-up, teaching or retail role.
- A second top or bottom only when it answers a different commercial question.
The Yoga Activewear collection can help a buyer name these roles. The Racerback Cropped Yoga Tank provides a concrete reference for racerback position, neckline, armhole, body length and waistband overlap. The Cross-Back Padded Sports Bra can support discussion of strap route, back openness, lower edge and inner construction.
These are product-direction references, not pre-approved barre uniforms. If the buyer changes coverage, body length, strap position, support construction, waistband, material, panel route or another specification, the work belongs in the Custom Activewear development route.
How should neckline, armhole and side coverage be reviewed?
Coverage should be written as an observable boundary. “Modest,” “secure” and “studio ready” are subjective until the buyer marks what should remain covered, in which position, on which wearer and size.
For a top or bra, record:
- Neckline shape and measured reference point at rest.
- Neckline position during forward hinge, overhead reach, supine and side-lying positions selected by the buyer.
- Armhole depth and side-body coverage.
- Strap position at the shoulder and back.
- Lower-edge or underband position.
- Body length and overlap with the intended waistband.
- Whether the wearer pulls the neckline, armhole, strap or hem.
- Whether the observation appears in one movement or across the full sequence.
- Which change the next sample is intended to test.
Separate an observation from a solution. “The side edge moved away from the body during the selected side-lying position” is evidence. “Raise the armhole” is one possible pattern action, but it may affect circumference, strap balance, mobility, binding length and appearance. The technical team should identify the proposed action and the next sample should test it.
Do not promise that one neckline or armhole suits every customer. Coverage is affected by garment size, body proportions, fabric, elastic, construction, strap length and the buyer’s intended fit.
What should be checked on straps, backs and bra construction?
Strap and back design influence both visual identity and the fit review. Decorative complexity should not replace a clear record.
Check:
- Strap width, route, spacing and attachment points.
- Whether straps sit at the intended shoulder and back positions.
- Back-panel height and openness.
- Binding, elastic or seam behaviour along curved edges.
- Lower-edge or underband position at rest and through the sequence.
- Lining, removable-cup or fixed internal construction when included.
- How the strap and back layout interacts with a layer.
- Logo location relative to straps, seams and stretch zones.
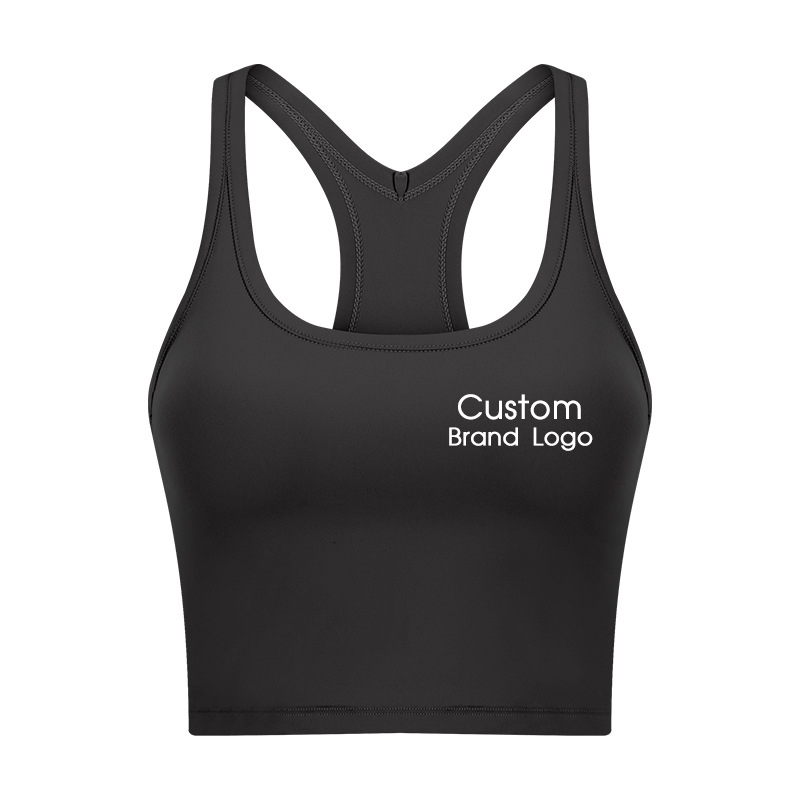
*Real inPACE product reference only. The image is not evidence of a barre test, universal fit, material performance, support level or customer approval.*
The image makes the design conversation more precise: a buyer can mark the racerback junction, back opening, logo zone, hem and waistband relationship. It cannot confirm the intended class, size range, cup construction or revised fit.
If cups or inner support are requested, identify the configuration reviewed. Record cup shape, pocket opening, lining, elastic, seam and garment size. Do not transfer approval from one inner construction to another because the outer silhouette looks similar.
How should leggings and studio bottoms be developed?
For a barre legging, the waistband is part of a larger fit system. Review waist opening, waistband height, front and back rise, hip and thigh relationship, gusset, seam route, inseam and leg opening together.
The Custom Leggings Manufacturer guide explains the wider development process for pattern, fabric, waistband, seams and size range. In a barre-specific review, add the class positions and transitions selected by the buyer.
Observe:
- Waistband position before and after the movement sequence.
- Front, side and back balance.
- Whether the waistband folds, shifts or is manually adjusted.
- Seam locations during standing, seated, kneeling, side-lying and supine positions in scope.
- Gusset and rise relationship on the named sample.
- Knee and calf relationship during repeated flexion.
- Inseam and hem position.
- Surface and coverage on the actual colour, size and wearer.
- Top-hem and waistband overlap.
Avoid the shorthand “squat proof” as an approval record. Define the material, colour, sample, size, wearer, lighting and body position used for the buyer’s coverage review. A result on one black sample does not automatically approve a pale colour, printed version, larger size or revised pattern.
How should the top and bottom work as one outfit?
Garments can pass separate measurement checks and still create an unresolved outfit. Review them together.
| Outfit decision | Review on each garment | Review as a set | Reopen when |
|---|---|---|---|
| Coverage and overlap | Top body length; bottom rise and waistband | Gap or overlap through the named positions | Body length, rise, material or size pairing changes |
| Visual proportion | Neckline, hem, waistband and leg line | Approved relationship from front, side and back | Silhouette, colour blocking or panel route changes |
| Colour relationship | Colour standard on each approved material | Pair under the buyer’s selected lighting | Material, dye route, finish or supplier lot changes |
| Logo visibility | Artwork, method and measured placement | Visibility with the layer open, closed or removed | Artwork, placement, garment or layer changes |
| Selling configuration | Top and bottom size range | Fixed-set or separate-size combinations reviewed | Assortment or permitted pairing changes |
Record the exact top version, bottom version and sizes worn together. If customers may choose separate sizes, identify the combinations physically reviewed and keep other pairings open. One matching sample set does not prove the whole matrix.
What does a useful layering plan include?
A layer needs a job. “Add a jacket” is not enough.
Define whether the layer is for arrival, warm-up, teaching, between-class use or retail styling. Then specify:
- Silhouette and intended ease.
- Body and sleeve length.
- Neck opening, front opening or closure.
- Pocket type and whether a pocket is actually required.
- Cuff and hem behaviour.
- Intended garment worn underneath.
- Whether the layer is reviewed open, closed and removed.
- Logo visibility in each state.
- Storage or carry expectation after removal.
- Material, trim and care questions.
A layer intended only for arrival should not silently dictate the fit of the close class outfit. Conversely, a close top should not be approved without the layer if the commercial styling always presents them together.
When the layer changes, repeat the relevant outfit review. Added bulk, length, zipper, pocket or trim can change silhouette, access and logo visibility even when the base top and bottom remain untouched.
Which material questions should be sent to the supplier?
Material descriptions are most useful when tied to decisions. “Soft,” “buttery,” “breathable” and “four-way stretch” are not complete specifications or proof.
Ask:
- What handfeel and surface does the brand intend?
- Which direction and degree of stretch is needed for the proposed pattern?
- How will stretch and recovery be observed on the actual garment?
- What coverage question must be checked on each colour and size?
- Does the material work with the proposed binding, elastic, seam and logo method?
- How does it behave after the buyer’s agreed care-review procedure?
- Are the material identity, composition, weight and finish documented for the sample?
- Which approvals must reopen if the material or colour changes?
The Fabrics and Trims page helps organise main fabric, lining, elastic, thread, binding, labels and other components. A swatch can narrow a direction, but the finished garment remains the relevant fit, coverage and construction evidence.
Do not make moisture, compression, recovery, opacity or durability claims without a defined method and supporting evidence. If the project requires a test standard, identify the method, sample condition, acceptance criterion and responsible party.
Which seams and contact areas belong in the review?
A barre buyer does not need to remove every seam. The team needs to know where seams sit and what was observed.
Create a contact map with:
- Garment panel and seam name.
- Body location.
- Movement or floor position.
- Review duration or repetition chosen by the buyer.
- Wearer observation.
- Visible effect on the garment, if any.
- Proposed construction, placement or fit action.
- Evidence required on the next sample.
The Activewear Seam Construction guide explains why seam type, allowance, thread, material, placement and stretch zone should be discussed together. A flat-looking seam in a photograph does not prove comfort or durability.
If a reviewer reports pressure or irritation, record the condition without immediately assigning one cause. Size, pattern balance, seam placement, construction thickness, material, floor surface or wearer position may all be relevant. The technical team should determine the next controlled check.
How should the fit model and movement review be documented?
Use an identifiable fit record rather than a collection of anonymous phone photos.
Include:
- Controlled wearer ID and relevant body measurements.
- Sample code, revision, colour and size.
- Top, bottom and layer versions worn together.
- Starting garment position.
- Class format and named movement or position.
- View, measurement or garment boundary being reviewed.
- Observation during and after the sequence.
- Any wearer adjustment.
- Requested action, owner and status.
- Resample trigger.
The Activewear Fit-Model Brief helps separate wearer identity, measurement, movement, observation and action. One wearer provides evidence for one named garment and body. It does not approve the whole customer population or size range.
A practical barre sequence might include a neutral standing view; arms raised; forward hinge; repeated knee flexion; a lunge or wide stance selected by the class reviewer; transition to kneeling; seated and side-lying positions; supine position; then return to standing. The buyer or qualified instructor must define the actual sequence. Record garment behaviour, not exercise performance.
How should sample comments be written?
Useful sample comments make the next decision clear. Write them while the garment, wearer and class sequence are still identifiable.
Instead of “top rides up,” record: “Sample B2, size M: after the selected standing-to-kneeling transition, the front hem finished 25 mm above its marked starting reference and the wearer pulled it down once. Confirm whether the next check should isolate body length, hem circumference, material recovery or the top-to-waistband relationship.”
The comment does not prescribe the solution. It preserves:
- Sample and size.
- Wearer and class context.
- Garment location.
- Observable change.
- Adjustment, if any.
- Technical question.
- Next-sample purpose.
Use a consolidated decision log when several reviewers participate. A class professional can define movement context, a fit reviewer can measure garment balance, the brand can approve the intended look and the technical team can propose a pattern or construction action. Name the final approval owner.
The Activewear Sample Plan can help structure sample purpose, inputs, comments and approval gates. Close each item as approved, accepted with a recorded limitation, revise and recheck, or open pending information.
How should size range and grading be planned?
Approve the base sample before treating the size range as solved. Then identify which measurements and relationships need grade review.
For barre tops and bras, review neckline, armhole, bust, strap position, lower edge and body length. For bottoms, review waist opening, waistband height, rise, hip, thigh, knee, inseam and opening. For the outfit, review top-bottom overlap and the selling combinations.
The Activewear Size Grading guide explains why a larger or smaller size is not simply a scaled picture. Record grade rules, key measurements, tolerances, sample sizes reviewed and any size-specific construction or logo-placement rule.
Do not use one studio’s staff measurements as the consumer size curve. Instructor garments, fit samples and retail assortment planning are separate evidence sets. If the brand sells fixed sets, state how size pairing works. If it permits separate sizes, define the operational matrix and the combinations reviewed.
When should branding enter development?
Branding should enter when the garment, material, artwork and purpose are clear enough for a physical decision.
Record:
- Approved artwork file and version.
- Exact logo dimensions and measured placement.
- Intended application method, subject to compatibility confirmation.
- Garment panel, material, colour and size.
- Stretch or seam relationship at the placement.
- Layer state in which the mark should be visible.
- Label, hangtag and packing scope.
- Physical sample or strike-off evidence required.
Printing, embroidery and other applications depend on artwork, material, construction, placement and supplier capability. Treat them conditionally until feasibility and sample evidence are confirmed. A method approved on a stable layer may not transfer to a highly stretched close top.
If a logo moves because a strap, hem, waistband or panel changes, reopen placement review. Do not rely on an image mock-up as final approval for scale, colour, surface or stretch interaction.
What should each sample prove?
Give each sample a defined decision.
| Sample purpose | Required inputs | Review focus | Exit evidence |
|---|---|---|---|
| Silhouette and fit direction | Reference, measurements, intended fit, wearer | Proportion, balance, neckline, armhole, hem, waistband and rise | Marked comments and next pattern action |
| Outfit and movement review | Identified top, bottom, layer and class sequence | Coverage, overlap, shifting, adjustments, seams and transitions | Movement-linked observation log |
| Material and construction confirmation | Controlled material and component identities | Handfeel, recovery question, coverage, seam and edge construction | Approved physical sample and retained component record |
| Branding confirmation | Approved artwork, method proposal and measured placement | Scale, colour, surface, stretch zone and layer visibility | Approved strike-off or branded sample |
| Size evidence | Grade rules, named sizes and identified wearers | Key measurements, proportions and outfit relationship | Size-specific comments and approval status |
| Pre-production confirmation | Complete approved specification and production inputs | Whether the production reference matches approved decisions | Signed reference, open-issue closure and handoff record |
Sample and production timing depends on confirmed scope, materials, components, revisions, capacity and approval speed. Ask for a project schedule only after the factory has the required inputs; do not turn an indicative timing into a promise.
When is factory-custom development the right route?
Use factory-custom development when the buyer requires one or more of the following:
- New pattern or materially changed fit.
- Revised neckline, armhole, strap, back or body length.
- Changed waistband, rise, gusset, seam route, inseam or opening.
- Project-specific material, lining, elastic or component.
- New coverage boundary or outfit relationship.
- A coordinated layer designed around the class outfit.
- Size range and grading developed for the brand.
- Branding integrated with a changed panel or stretch zone.
- Physical samples and controlled approval evidence.
A catalogue-informed private-label route may be more suitable when an accepted base garment remains unchanged and the work is limited to confirmed branding, labels and packing. Do not describe a changed base style as private label merely because it started from a catalogue image.
Multiple partner factories can be useful when a programme contains different product categories or specialist processes, but coordination still needs one controlled specification, sample identity, approval record and production handoff. More suppliers do not remove the buyer’s responsibility to approve the actual product.
Buyer checklist for a barre or sculpt-class apparel brief
Before requesting a quote or sample, confirm that the team can provide:
- Class format and customer profile.
- Named movement and position sequence for garment review.
- Product roles and commercial route for each style.
- Reference garments, sketches or tech packs.
- Intended fit and coverage boundaries.
- Neckline, armhole, strap, hem, waistband, rise and inseam questions.
- Top-bottom overlap and layer plan.
- Material handfeel, stretch, recovery, coverage and surface questions.
- Base sample size, size range and fit-model information.
- Branding, labels and packing direction.
- Sample purpose and approval owner.
- Quantity direction and destination as project context.
- Desired launch date as a buyer target, not a confirmed factory promise.
The inPACE process overview shows how a project can move through feasibility, sampling, approval, production coordination, QC and packing. Share the class movements, product roles, coverage concerns, layering plan, size range and sample questions with inPACE when the brief is ready for a factory-custom discussion.
Product directions
Explore relevant activewear products
Use these product pages as practical references for your brief, then confirm materials, fit, customization, and production details through sampling.
Yoga Activewear Collection
Use real studio product directions to define the top, bottom and layer roles before writing the barre-specific fit and coverage questions.
View product directionCross-Back Padded Sports Bra
Use this real bra direction to mark neckline, strap, back, lower-edge and inner-construction questions for physical sample review.
View product directionCustom Activewear Development
Use factory-custom development when fit, coverage, material, waistband, straps, construction or layering must change.
View product directionFAQ
Buyer questions
What should a barre workout apparel manufacturer brief include?
Include the class format, product roles, intended fit and coverage, top-bottom overlap, layer plan, reference garments, material questions, base size, size range, movement-review sequence, branding scope, sample purpose and approval owner.
Is barre apparel the same as yoga apparel?
The categories can share silhouettes, but a yoga reference does not automatically approve a barre programme. Review the actual garment, class positions, transitions, coverage boundaries, layer plan, size and wearer, then retain the evidence.
What coverage points should a barre top sample check?
Check neckline, armhole, side coverage, strap route, lower edge, body length and top-to-waistband overlap in the named standing and floor positions. Record garment version, size, wearer, movement, observation and any adjustment.
How should barre leggings be sampled?
Review waist opening, waistband height, rise, hip and thigh relationship, gusset, seam route, inseam and opening. Observe waistband position, coverage and garment adjustments through the buyer's selected class sequence on identified samples and wearers.
Does sculpt-class clothing shape or change the body?
No claim of body shaping, weight loss, posture correction or medical benefit is made here. Sculpt class is only the name of a class context. Apparel development should focus on observable fit, coverage, construction, layering and sample evidence.
When should a warm-up layer be included?
Include a layer when it has a defined arrival, warm-up, teaching, between-class or retail role. Specify the outfit beneath it, open and closed states, length, opening, sleeve, pocket and logo questions, then review the physical outfit.
Does one fit sample approve every barre apparel size?
No. A fit sample supports the named garment, size and wearer. The full range still needs grade rules, key measurements, construction relationships, appropriate size evidence and a record of the top-bottom combinations reviewed.
When should a barre apparel sample be made again?
Resample when a change can affect an approved decision, including pattern, measurements, neckline, armhole, straps, body length, waistband, rise, seams, material, lining, colour, logo, layer or size pairing. State what the new sample must prove.