
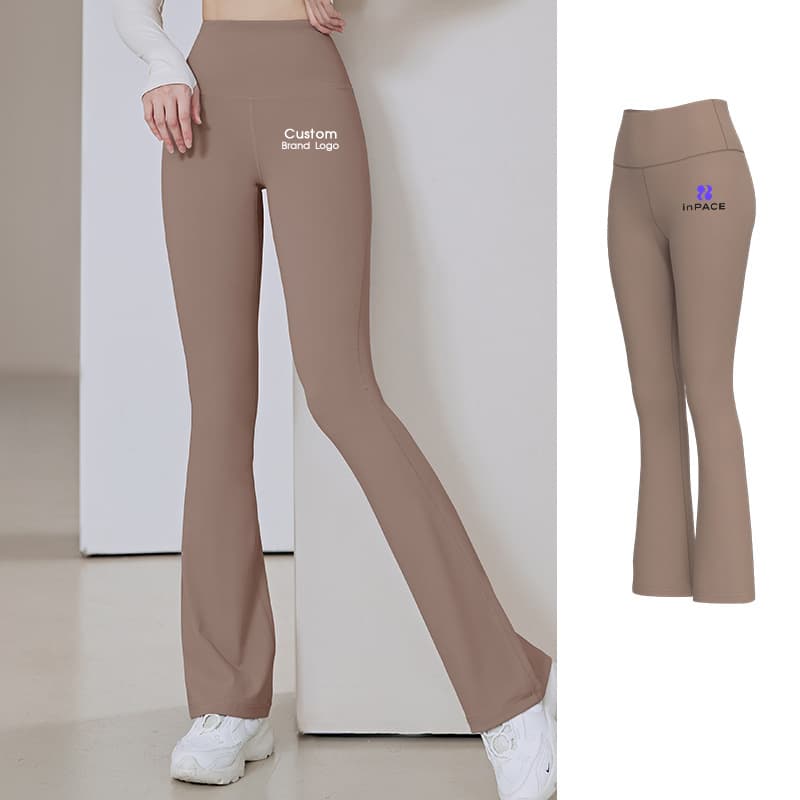
Direct answer. A Reformer Pilates apparel manufacturer brief should identify the class format, apparatus contact points, outfit roles and movements used for review. Approve waistband position, seam placement, inseam, leg opening, top coverage and layering on the actual sample. Record the wearer, size, apparatus setup, observation, requested action and resample trigger instead of assuming a yoga style is already suitable.
This guide is for B2B activewear brands, Pilates studios and buyers developing garments for Reformer classes. It is not a general Yoga or Pilates market overview. The buyer decision is how to turn carriage, platform, straps, loops, box work and floor transitions into specific garment and sample questions.
The commercial path is factory custom manufacturing. Existing Yoga or studio products can supply a useful silhouette reference, but any requested change to fit, waistband, seam route, inseam, leg opening, coverage, strap path, pocket, layer, material or construction belongs in a controlled development and sample process. A catalogue reference does not prove suitability for a Reformer programme, live stock, a fixed MOQ, price or delivery time.
What should a Reformer Pilates apparel manufacturer brief define first?
Define the class and garment jobs before discussing a material name or logo.
Send:
- The Reformer class format and intended customer.
- The apparatus and accessories used in the planned review.
- The top, bottom and optional layer roles.
- Reference garments, sketches, tech packs or annotated images.
- Intended fit, coverage and outfit relationship.
- Waistband, seam, inseam, leg-opening and strap questions.
- Movements and body positions to observe.
- Known apparatus contact points.
- Base sample size, intended size range and wearer information.
- Material handfeel, stretch, recovery, coverage and surface questions.
- Logo, labels and packing direction.
- The decision each sample should support.
- Approval owner and the condition that requires another sample.
The broader Yoga Wear Manufacturer guide compares supplier capability across yoga and studio collections. Use this page when the open decisions come specifically from Reformer apparatus contact, supine and seated positions, strap and carriage work, outfit coverage and a repeatable sample review.
How is Reformer apparel different from a generic studio brief?
A generic studio brief may name “soft handfeel,” “four-way stretch” or “high waist” without explaining where those decisions matter. A Reformer brief connects the garment to positions and contact points that the product team can observe.
| Brief area | Generic studio statement | Reformer-specific question | Evidence to retain |
|---|---|---|---|
| Waistband | High-rise leggings | Does the waistband stay at the intended position through supine work, hip articulation and return to standing? | Worn views, waistband reference points, wearer comment and adjustment record |
| Seams | Comfortable seams | Which seams contact the carriage, box or body under load, and is the observation caused by location, construction or fit? | Marked garment views, apparatus setup and sample identity |
| Inseam and opening | Full length or flare | Does the length or opening interfere with footbar, platform, loops, transitions or the buyer’s intended footwear policy? | Side views, measured length, movement notes and next action |
| Top coverage | Fitted studio top | Does the neckline, armhole, hem and top-bottom overlap remain within the approved coverage during supine, kneeling, seated and overhead positions? | Front, side and overhead views tied to named movements |
| Layering | Optional warm-up layer | When is the layer worn, where does it sit on the carriage, and does it obscure branding or crowd the waistband? | Outfit views with layer open, closed and removed |
This table is a briefing framework, not a performance test or universal dress rule. The buyer selects the relevant apparatus setup and movement sequence with a qualified class professional, then records garment observations without making medical, safety or performance claims.
Which product roles belong in the first Reformer outfit?
Begin with the smallest outfit system that can answer the product question.
A first review might include:
- A close top whose neckline, armhole, strap path and hem can be observed.
- A legging or studio bottom with a defined waistband, rise, inseam and opening.
- A light layer only if it has a real arrival, warm-up, teaching or retail role.
- A second bottom silhouette only when the buyer needs to compare a close ankle with a flare or another opening.
The Yoga Activewear collection can help name product roles before custom development starts. The Racerback Cropped Yoga Tank can support questions about neckline, armhole, racerback path, body length and top-bottom overlap. The High-Waist Flared Yoga Pants can support waistband, upper-leg fit, inseam and flare discussions.
These pages are product-direction references. They do not establish the material, measurements, construction or approval evidence for a Reformer capsule.
How should a waistband be reviewed on the Reformer?
Do not reduce waistband review to “rolled” or “did not roll.” Record the garment, wearer, position and what changed.
Review:
- Waistband height at rest.
- Top edge position before and after the sequence.
- Waist opening and hip relationship on the named size.
- Front, side and back balance.
- Rise and gusset relationship.
- Whether the wearer pulls, folds or repositions the band.
- Whether the top hem catches under or sits above the band.
- Whether an apparatus or accessory contact coincides with the observation.
- Whether the issue appears in one movement or throughout the session.
Separate evidence from the requested action. “The back waistband moved down during the return from supine to seated and the wearer adjusted it once” is an observation. “Increase back rise” is a proposal that can affect pattern balance, grading and outfit proportion. The next sample should identify which proposal is being tested.
When a waistband feels different after a material or elastic change, reopen the relevant review. A shared measurement does not guarantee the same worn behaviour across materials, colours, constructions or sizes.
Which seams and contact points should the buyer map?
Create a contact map rather than asking the factory to remove every seam.
Record:
- Garment panel and seam name.
- Body location.
- Apparatus or accessory involved.
- Position or movement when contact occurs.
- Duration or repetition selected by the buyer.
- Wearer observation.
- Visible garment effect, if any.
- Whether the observation changes after repositioning the garment.
- Proposed construction, fit or placement action.
- Evidence needed on the next sample.
The activewear seam-construction guide explains how seam type, allowance, placement, thread, material and stretch zone should be discussed together. A flat-looking seam in a photograph is not proof of comfort, durability or suitability. Review the actual construction on the proposed product and material.
Avoid treating every pressure sensation as a seam defect. It may relate to garment size, pattern balance, apparatus setup, wearer position, component thickness or another factor. Record the condition and ask the relevant product and class reviewers to determine the next check.
How should inseam, hem and flare be approved?
Leg length is both a measurement decision and a use-context decision. Record the approved measurement method, sample size, wearer reference and footwear context. Then observe how the hem or opening behaves in the buyer’s selected movements and transitions.
For a close legging, check the ankle finish, excess or tension along the leg, inseam balance and whether the hem shifts. For a flare, check where the flare begins, how much opening is intended, how the hem clears the floor or platform in the stated context, and whether the silhouette changes when the knee bends.
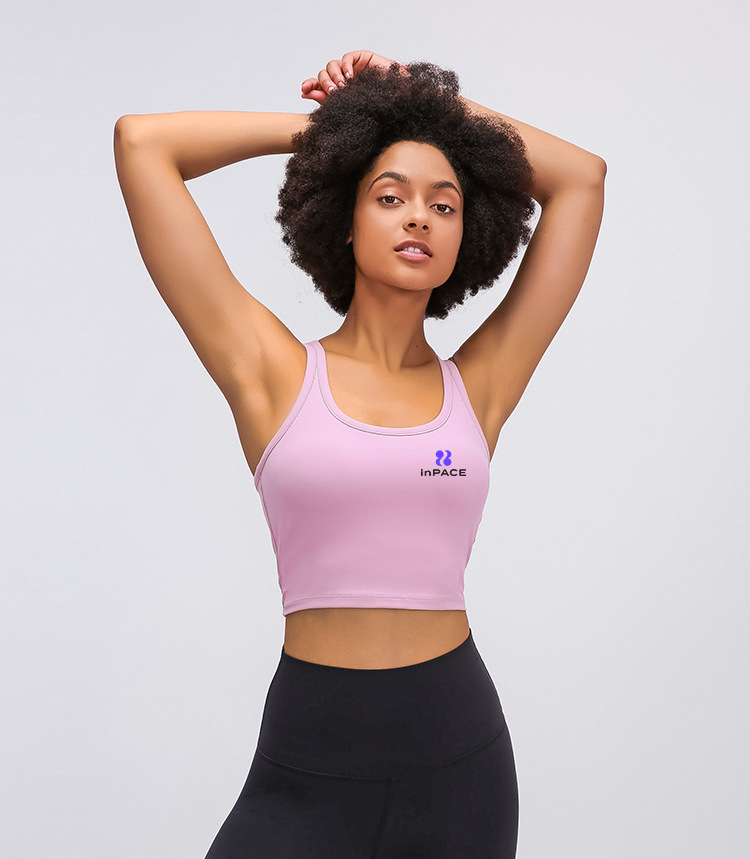
*Product-direction reference only. The image does not document a Reformer Pilates test, approved fit, material performance, customer programme or production result.*
Do not infer the correct inseam or flare from the wearer’s height alone. Body proportions, rise, waistband position, pattern, material and intended styling all matter. If the range includes more than one length, identify each variant and its size relationship rather than editing the order informally.
What should be checked on tops and bras?
The top review should connect coverage, strap path and body length to the planned outfit.
Observe:
- Neckline position at rest and in supine, seated and kneeling positions.
- Armhole and side coverage during reach and rotation.
- Strap location relative to shoulder movement and apparatus contact.
- Underband or lower-edge position where relevant.
- Body length and overlap with the approved waistband.
- Whether the top shifts when the wearer moves from lying to upright.
- Whether the wearer adjusts the neckline, hem or straps.
- How a layer changes the top’s fit, visibility or access.
The Cross-Back Sports Bra reference can help a buyer mark strap, neckline, underband and back-coverage questions. It does not establish a support level, cup fit, material or Reformer suitability. Those require the intended garment, size, wearer and physical sample.
If removable cups, lining or support construction are part of the brief, record the exact configuration reviewed. A visual reference cannot approve internal construction.
How should the top and bottom be approved as an outfit?
Each garment needs its own measurement and construction review, but the outfit needs a second check.
| Outfit decision | Review separately | Review together | Reopen when |
|---|---|---|---|
| Top and waistband overlap | Top body length and bottom rise/waistband | Coverage through named positions and transitions | Body length, rise, waistband position, material or size pairing changes |
| Strap and back relationship | Top strap path and back construction | Apparatus contact and layer interaction | Strap, neckline, back panel or layer changes |
| Colour and surface | Approved colour reference for each material | Accepted relationship under the buyer’s chosen light | Material, dye route, finish, panel or colour changes |
| Logo visibility | Artwork, method and measured placement on each garment | Visibility in the planned outfit and layer state | Artwork, size, placement, garment or layer changes |
| Fixed or separate sizing | Top and bottom size ranges | The combinations physically reviewed | Size range, grade, set configuration or selling route changes |
Record the top version, bottom version and sizes together. If a customer can choose separate sizes, list the pairings reviewed and keep untested combinations open. A passing review on one pairing does not approve the entire matrix.
What material evidence should the sample plan request?
Describe the question before selecting a material.
Useful questions include:
- How does the material recover after the movement sequence selected by the buyer?
- Does the waistband return to its intended position?
- Is coverage acceptable on the actual colour, pattern, size and wearer?
- How does the surface respond at mapped apparatus contact points?
- Does the handfeel remain acceptable in the intended garment construction?
- Does seam appearance change when the material stretches across the relevant position?
- Is the logo proposal compatible with the selected surface and stretch zone?
- What changes after the buyer’s agreed care-review procedure?
The Fabrics and Trims page can organise material, elastic, lining, thread, label and component discussions. Terms such as buttery, breathable, sweat-wicking, squat-proof or abrasion-resistant should not be treated as evidence. Define the physical question, sample condition and decision owner.
If a proposed material changes, identify which fit, coverage, seam, colour, logo and care observations need to be repeated. Do not transfer approval from a loose swatch to the finished garment automatically.
How should the fit model and movement sequence be documented?
Use an identifiable fit record.
Include:
- Controlled wearer ID and relevant body measurements.
- Sample size and garment version.
- Top and bottom pairing.
- Apparatus and accessory setup.
- Starting garment position.
- Named movement or position.
- View or measurement needed.
- Observation during and after the sequence.
- Wearer adjustment, if any.
- Decision owner.
- Requested action and resample trigger.
The activewear fit-model brief helps separate wearer identity, measurement, movement, observation and action. One wearer provides evidence for the named sample and body; that evidence is not proof of fit across all customers or sizes.
The buyer and qualified instructor should choose the class movements. The garment supplier should not design exercise technique or claim that apparel makes an activity safe.
How should sample comments be written after the session?
Write comments while the sample, wearer and apparatus setup are still identifiable. A useful comment separates four things: what the reviewer saw, where and when it happened, what outcome the buyer wants, and what evidence will close the issue.
Use a record with:
- Sample code, revision, colour and size.
- Top, bottom and layer versions worn together.
- Wearer ID and measurements used for the review.
- Apparatus, accessory and setup reference.
- Movement or position selected by the buyer.
- Garment location and a marked photo reference.
- Observation and wearer comment.
- Proposed action or supplier question.
- Affected measurement, pattern, material, seam, component or artwork file.
- Decision owner and status.
- Next-sample purpose.
- Approvals that remain valid and those that must be reopened.
Avoid comments such as “waist is wrong,” “seam is uncomfortable” or “make it Pilates friendly.” They do not tell the product team which sample, body position or garment area produced the observation. Write, for example: “On sample P2, size M, the wearer adjusted the back waistband after moving from supine footwork to seated position; confirm whether the observation relates to back rise, waist opening, material recovery or this size-wearer relationship. Review the proposed action on the next identified sample.”
The example does not decide the technical solution. It preserves the evidence and prevents a general complaint from becoming an unreviewed pattern instruction.
When several reviewers attend, record one consolidated decision rather than forwarding conflicting messages to the factory. A qualified instructor can define the movement context; the fit reviewer can record garment balance and measurements; the brand owner can decide the intended look and customer promise; the technical team can propose the next product action. Name those roles so a comment is not treated as approved merely because it appears in a chat.
Close each issue with a status such as approved, accepted with recorded limitation, revise and recheck, or open pending information. If a later comment changes an approved measurement, material, seam, colour, logo or size pairing, connect it to the earlier decision and identify what must be reviewed again. That trace is especially important when more than one sample session or partner factory is involved.
How should sizes and grading be planned?
Approve the base sample before treating the size range as solved. Then identify measurements, proportions and construction relationships that need grade review.
For a Reformer capsule, examine:
- Waist opening, waistband height and rise.
- Hip and thigh relationship.
- Inseam, knee position and leg opening.
- Top neckline, armhole, bust and body length.
- Strap length or placement where graded.
- Underband and lining relationships.
- Top-bottom overlap by selected size pairing.
- Logo placement rules across sizes.
The activewear size-grading guide explains why a larger or smaller size is not simply a scaled picture. Record grade rules, sample sizes reviewed, measurement tolerances and any size-specific construction or placement decision.
Do not use one studio’s staff list as a consumer size curve. Retail sizing needs its own customer evidence and order plan.
When should branding enter the sample?
Branding should enter when the garment, material, artwork and purpose are clear enough for a physical decision.
Record:
- Artwork version.
- Garment and sample version.
- Proposed method.
- Measured placement from a stable reference.
- Logo dimensions and colour.
- Material and garment colour.
- Stretch, seam and apparatus-contact zone.
- Layer state.
- Approval evidence.
A logo placed where the body contacts the carriage may need a different discussion from a mark on a low-contact area. Printing or embroidery can be considered when relevant, but compatibility and physical result require project confirmation. Do not approve a logo only on a digital mock-up.
Labels, care information, hangtags and packing should remain connected to the exact garment version. The buyer owns market-facing wording and identifiers; the supplier can review physical execution and placement within the confirmed scope.
What should each sample prove?
Give every sample a limited decision.
| Sample purpose | Inputs | Approval evidence | Resample trigger |
|---|---|---|---|
| Silhouette and base fit | Product role, reference, measurements, base size and wearer | Worn views, measurements and fit decision | Pattern, measurement, size or product-role change |
| Apparatus-contact review | Mapped contact points, setup, garment construction and selected movements | Marked views, wearer observations and reviewer decision | Seam, panel, component, fit or setup change |
| Outfit coverage | Approved top and bottom versions, size pairing and sequence | Front/side/back views and overlap record | Top length, rise, waistband, strap, layer or size-pairing change |
| Material and colour | Confirmed material reference, colour, garment version and review question | Swatch/garment identity and physical observation | Material, finish, colour, lining or component change |
| Branding and labels | Artwork, method, placement, garment and label files | Physical proof and measured placement record | Artwork, method, size, placement, garment or material change |
Use the activewear sample-plan guide to order dependencies. If fit or construction is still open, a final logo or packing sample may be premature.
When does the project move into factory-custom development?
This article already follows the Factory Custom path. Use Custom Activewear Development when the project changes:
- Pattern or fit block.
- Waistband, rise, gusset or panel.
- Seam type, route or allowance.
- Inseam, knee position, hem or flare.
- Neckline, armhole, strap or body length.
- Lining, support or internal construction.
- Pocket, loop or storage detail.
- Material, elastic, trim or component.
- Colour blocking or integrated artwork.
inPACE can discuss the design brief, fabric direction, stretch, coverage, support, construction and fit questions, then coordinate the appropriate sampling and production path through multiple partner factories once scope, materials, quantities and approvals are clearer. More than 30 years of garment-production experience informs that coordination. It is not a fixed MOQ, price, capacity, performance or timing promise.
The manufacturing overview explains how approved references can move into production communication, QC and packing. A development sample remains separate from a production release until the product, branding, quantities and packing instructions are confirmed.
What should the buyer prepare before requesting a review?
Prepare:
- Class format, customer and sales channel.
- Apparatus and accessories relevant to the garment review.
- Product roles and outfit relationship.
- References, tech packs, samples or annotated images.
- Features to keep, change or discuss.
- Waistband, seam, inseam, opening, strap and coverage questions.
- Base size, intended range and fit-model information.
- Material, colour, lining and component direction.
- Movement sequence and mapped contact points.
- Logo, labels and packing requirements.
- Sample purpose, reviewers and approval owner.
- Quantity direction and destination supplied as project context.
- Desired launch date supplied by the buyer, without treating it as a factory commitment.
The inPACE process overview shows how a brief can move through feasibility, sampling, approval, production coordination, QC and packing. Share the Pilates class format, product references, waistband and seam concerns, coverage target, size range and sample-review questions with inPACE when the project is ready for a factory-custom discussion.
Product directions
Explore relevant activewear products
Use these product pages as practical references for your brief, then confirm materials, fit, customization, and production details through sampling.
Yoga Activewear Collection
Use studio product directions to define top, bottom and layer roles before writing the Reformer-specific sample questions.
View product directionHigh-Waist Flared Yoga Pants
Use this real product direction to mark waistband, rise, inseam, flare and leg-opening questions for physical review.
View product directionCustom Activewear Development
Use factory-custom development when fit, material, waistband, seams, coverage, straps or construction must change.
View product directionFAQ
Buyer questions
What should a Reformer Pilates apparel manufacturer brief include?
Include the class format, apparatus and accessories, product roles, outfit pairings, references, intended fit and coverage, waistband and seam questions, inseam and leg opening, strap path, material direction, size range, movement sequence, contact points, branding, sample purpose and approval owner.
Can a yoga legging be used for Reformer Pilates without another sample?
A yoga legging can provide a silhouette reference, but that does not prove Reformer suitability. Review the actual waistband, rise, seams, inseam, opening, material, size and wearer through the buyer's selected apparatus positions and transitions, then record the evidence and any resample trigger.
Which seams should be checked for Reformer apparel?
Map the seams that contact the body, carriage, box or accessories in the selected review. Record garment location, apparatus setup, movement, wearer observation and sample identity. A seam photograph or construction name alone cannot establish comfort or suitability.
How should flared Pilates pants be reviewed?
Record waistband and rise, inseam, knee position, flare start, hem and opening on the named size and wearer. Observe the buyer's selected transitions and apparatus context, including footwear policy, without assuming one inseam or flare works for every body or class.
What should be checked on a Reformer Pilates top?
Review neckline, armhole, straps, side coverage, lower edge, body length and top-bottom overlap in the planned outfit. Record whether the garment shifts or is adjusted during supine, seated, kneeling and overhead positions selected by the buyer.
Does one fit sample approve the full Pilates size range?
No. A base sample supports the named wearer, size, garment and review. The buyer and manufacturer still need grade rules, key measurements, construction relationships, additional size evidence where appropriate and a record of which top-bottom combinations were physically reviewed.
When should a Reformer Pilates sample be made again?
Resample when a change can affect the approved decision, including pattern, measurements, waistband, seam route, inseam, leg opening, neckline, strap, material, lining, colour, logo placement, layer or size pairing. State which earlier evidence remains valid and what the new sample must prove.
Does inPACE manufacture grip socks for Pilates programmes?
This guide does not offer or define a grip-sock programme. It focuses on inPACE's apparel scope: tops, bras, leggings, flared pants and related layers. Buyers should keep accessories outside the apparel brief unless their supply scope and approval route are separately confirmed.