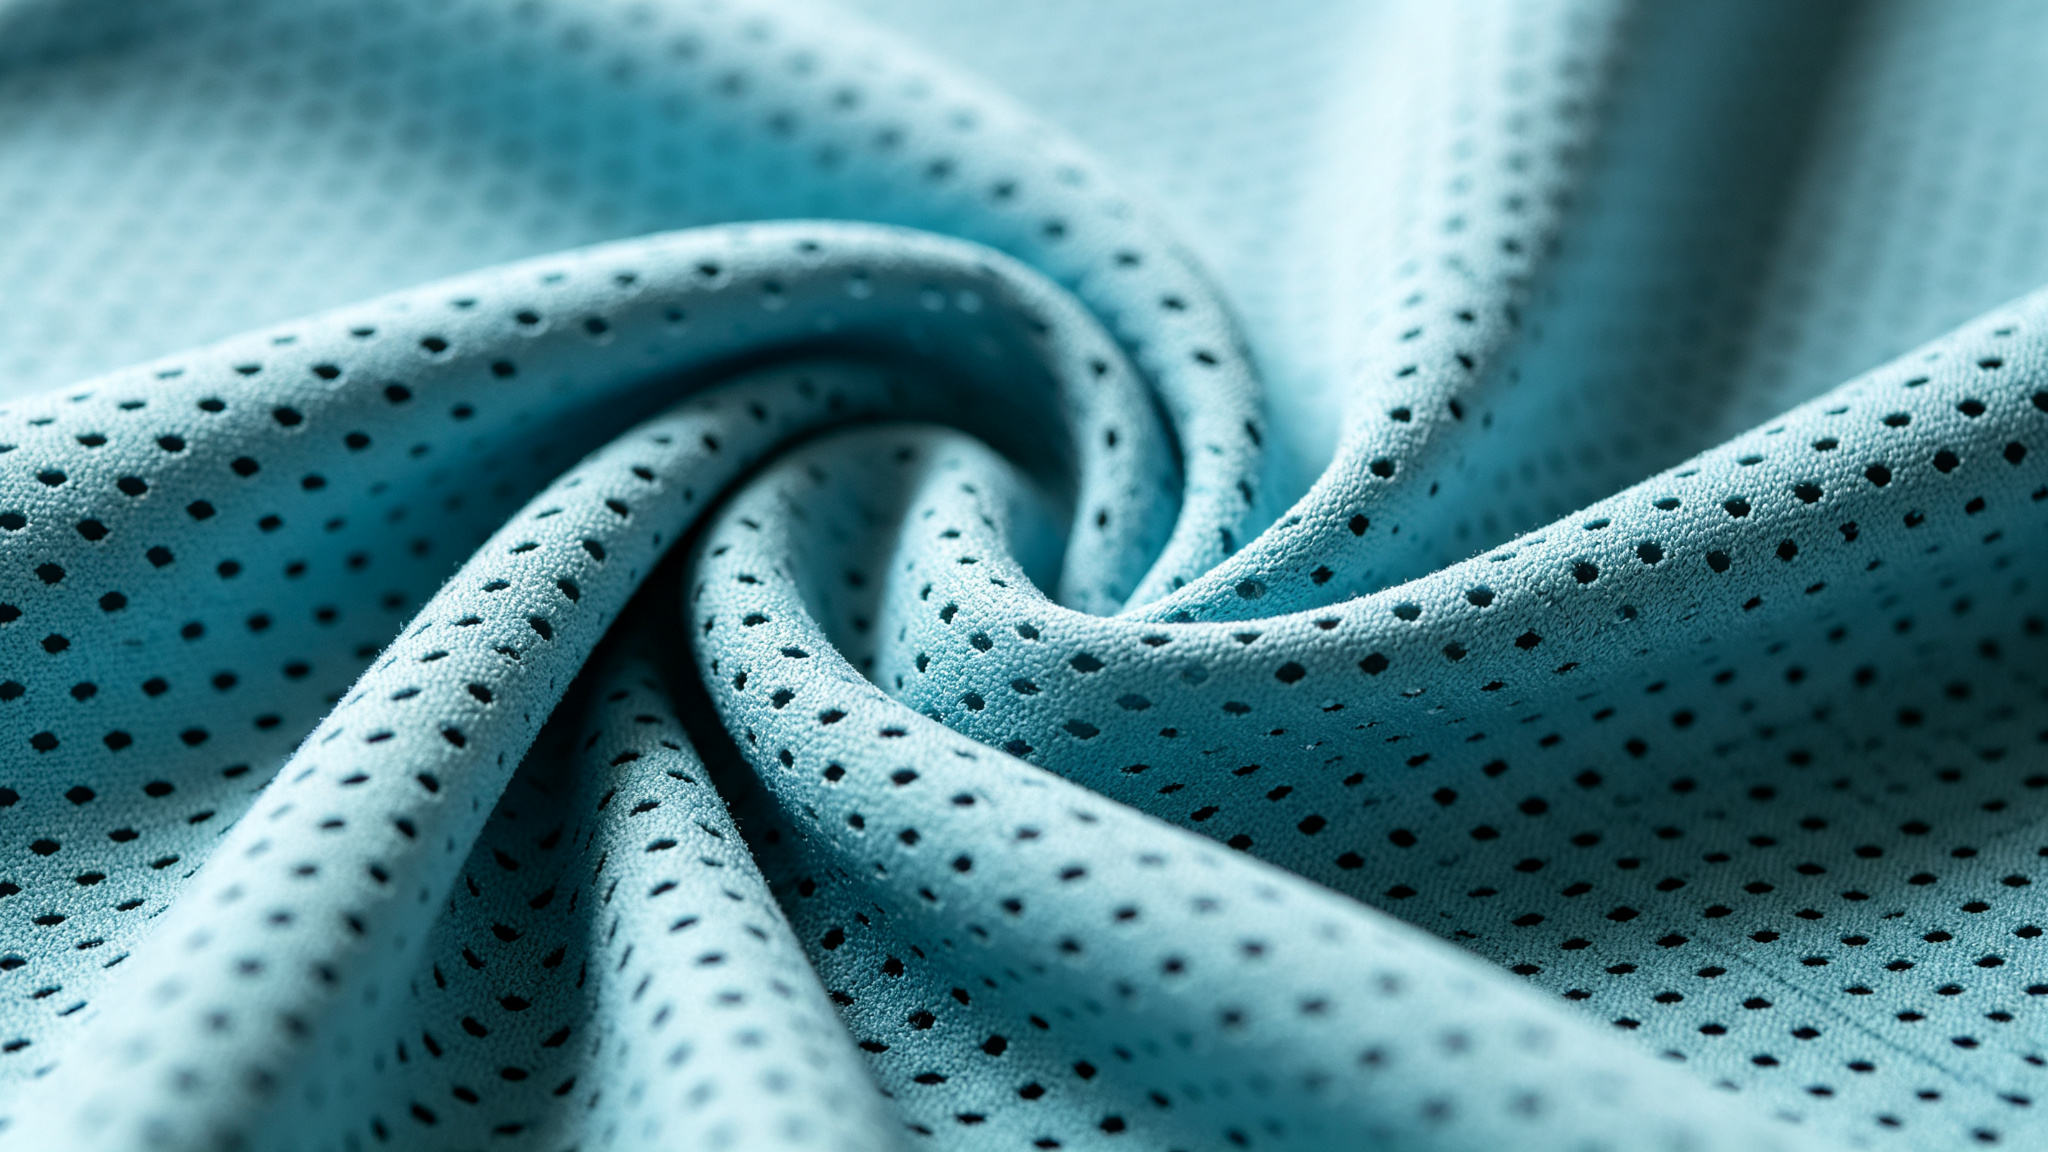
Mesh panels in activewear should be chosen for a defined garment role, not added as decoration alone. Each panel can affect airflow, coverage, appearance, stretch, seams and branding. Map it to a wearer need, compare it with adjoining fabric, then review the assembled sample. Product photos and material labels cannot prove finished-garment ventilation or comfort.
What should mesh panels in activewear accomplish?
The word mesh covers many structures. An open net, power mesh, spacer knit and fine athletic mesh can look similar in a small photograph while behaving very differently when stretched, lined, printed, stitched or viewed in motion. A specification that says only black mesh leaves the supplier and the sample reviewer without a shared reference. Record the actual candidate code when available, knit or construction description, weight if supplied, colour reference, usable width, direction of stretch and intended body zone. Mark unknown fields as open rather than guessing.
A ventilation goal also needs careful wording. Openings may allow more air to pass through a material than a denser adjacent fabric under comparable conditions, but that observation does not prove a particular wearer will feel cooler. Garment fit, body movement, layering, ambient conditions, sweat, the location and area of the panel, and the surrounding fabric all affect experience. If a measurable claim matters, define the property and test method with a qualified lab. ASTM D737 measures air permeability of textile fabrics under its stated conditions; it does not certify whole-garment comfort or a percentage improvement for a design. See the ASTM D737 scope.
How do you map a panel to a garment zone?
Start with a body map and a garment map, then compare them. The body map describes the activity, movement and wearer feedback the brand wants to address. The garment map shows actual pattern pieces, seams, lining, logos and stress points. A panel proposal is plausible only when the two maps connect. For example, a buyer may want a ventilated zone on a training top, yet a graphic, bra layer or pack strap may cover the intended area. The panel may still serve a visual or construction purpose, but it should not be described as delivering an unverified airflow benefit in use.
Mark zones on a front and back technical flat with a consistent reference. Identify panel shape, finished dimensions, grain or stretch direction, seam location, adjacent material, lining, intended opacity, colour and branding. Add movement notes: arms overhead, torso rotation, running stride, deep squat, reaching or court movement. These notes help the pattern and sample teams decide which dimensions and positions should be checked on-body. They do not replace a fit session or performance test.
A panel can occupy a high-movement or high-visibility area where the buyer values a distinctive visual break. It can also sit under a layer, beneath an arm, along a side body, or within a back yoke, each with different coverage and construction trade-offs. Do not generalize one zone to every body or size. The approved sample should be checked on the intended size range or on the project’s agreed fit sizes because a panel’s proportions may shift with grading.
| Panel zone | Buyer question | Sample check | Common trade-off to discuss |
|---|---|---|---|
| Underarm or side body | Does the zone align with the intended movement and layering? | Reach, rotation, arm-down and arm-raised views | More seams and different stretch across a high-movement area |
| Back yoke or upper back | Does the panel remain visible and uncovered in use? | Seated, standing and movement views with the intended base layer | A pack or outer layer may cover the panel; join lines may sit under tension |
| Legging or short side insert | Does the panel preserve coverage through extension? | Squat, lunge, stretch and recovery in the correct size | Opacity and seam loading need review together |
| Waistband or support zone | Is the material intended as a design insert or a support structure? | On-body recovery, roll and edge stability | Decorative mesh should not be presumed to supply power-mesh support |
| Chest or front-body insert | Is privacy preserved in dry and damp conditions? | Target colour, light source, stretch and layering review | A lining can change handfeel and create another seam or material interface |
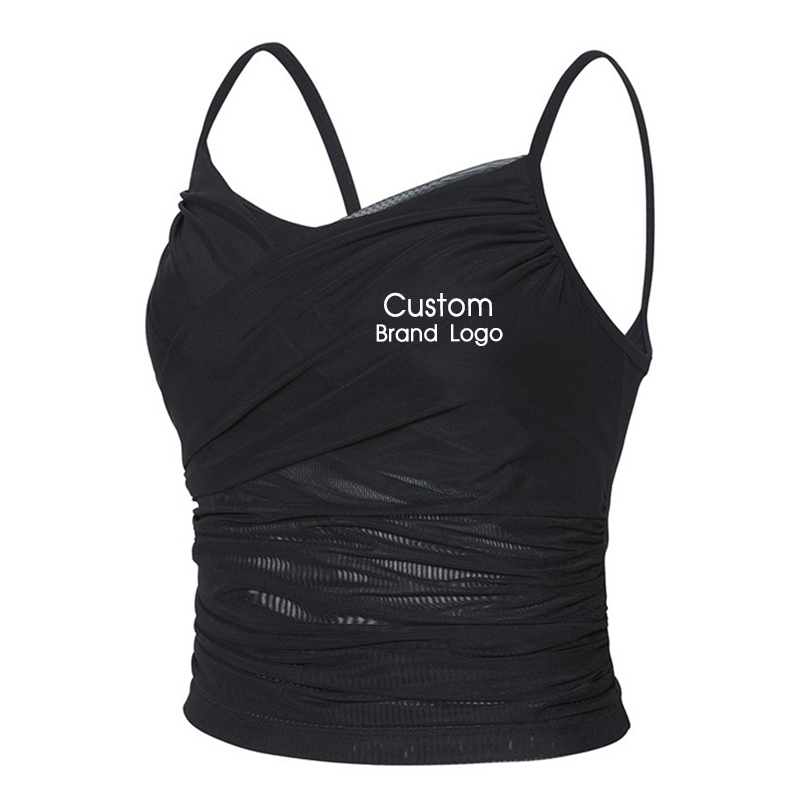
The pictured garment is a visual construction reference only; its image does not confirm the current material specification or airflow performance.
The buyer’s brief should distinguish a visual panel from a functional panel. A visual panel may be selected to create colour, texture or brand identity. A functional panel needs a defined use and evidence plan. One can serve both purposes, but the team should decide which objective governs if they conflict. If seam comfort, opacity or logo readability is the stronger purchase requirement, ventilation language should not override those approval criteria.
How should mesh and main-body fabric be compared?
A panel is a material pairing, not an isolated swatch. Compare the proposed mesh with the adjacent fabric for stretch direction, extension, recovery, thickness, surface, colour, care and sewing behaviour. The pair must be evaluated at their actual join. A mesh that is acceptable on its own may pucker beside a more stable fabric; a body fabric may recover differently after stretching; a lining may make the mesh appear denser; and a change in colour can alter perceived coverage.
Ask the supplier or development team to identify each candidate and each garment component. A useful comparison sheet leaves room for two or more candidates without presuming which one will pass. Record the candidate ID, composition supplied, construction, weight when documented, colour, stretch direction, panel location and source. If the composition or origin is not confirmed, use pending. Do not infer a mesh specification from a product catalogue photograph. A garment catalogue can help a buyer point to a silhouette or panel style; it does not confirm the current BOM.
Use matched specimens when asking a lab or internal team to compare a specific property. Agree which face is exposed, how the material is conditioned, whether it is stretched, and whether the specimen includes a lining or finish. For air permeability, ASTM D737 is a fabric method; a buyer should ask the lab whether the exact mesh, composite or finished construction is within scope. Any report should identify material, date, method, specimen condition and result. Do not convert a result into a garment-level comfort promise without additional suitable evidence.
For a visual screen, compare both materials in the target colours under consistent lighting. Photograph dry and damp samples only if damp appearance is part of the brief, and label the image as a visual observation. Keep camera position, light, background and exposure stable. If the buyer’s concern is opacity, review on-body under the intended stretch and light conditions; a flat, unstretched sample cannot settle that question. If a care claim matters, use the intended wash and drying process, preserve the instructions, and record what changed after each agreed cycle.
What does coverage mean for mesh?
Coverage has several meanings: visual opacity, physical modesty, protection from sun or abrasion, and coverage of a body area by the garment pattern. Mesh panel planning most often raises the first two, but a buyer should state the requirement. A dense-looking black swatch does not prove opacity in a lighter colour or when stretched. A panel that looks acceptable on a table may reveal more under movement, bright light, dampness, or a contrasting layer beneath it.
Specify who will evaluate coverage and how. The review should include the intended sample size, wearer or fit form, movement, base layer, lighting and target colour. If the garment is designed for multiple markets or activities, the brand must set its own coverage standard. The manufacturer can make the requested sample and document observations, but should not invent a universal pass threshold. State the agreed acceptance language in the tech pack or sample comments, such as no visible contrast under the named movement and lighting checks. That is project-specific, not a certified claim.
Lining is one possible response to a coverage issue, but it changes the product. It can add weight, warmth, seams, opacity and a second care consideration. It can also cover part of the mesh opening and alter airflow. A lining should be shown on the technical flat and in the BOM, then reviewed in the assembled sample. If the buyer uses a colour-matched lining, confirm whether it is truly matched to the mesh and body fabric under the same light. A photo rendering is not sufficient for final shade approval.
How do seams affect mesh-panel quality?
Each new panel edge usually adds a seam, and each seam joins materials that may stretch, feed or recover differently. A tidy sketch can hide a difficult production junction. Identify the intended seam type, stitch appearance, seam allowance, edge finish, stretch direction, topstitching and any reinforcement. The manufacturer and buyer can then review whether the seam should be adjusted for the material pair and intended movement. A sample proves the proposed construction more clearly than an isolated swatch or flat drawing.
Look at the seam while the garment is relaxed and under the movements that load it. Check for skipped stitches, waviness, puckering, thread exposure, local stiffness, seam allowance show-through, distortion and a panel edge that rolls or twists. These are observations to record, not proof that a particular seam method is always wrong. A seam that looks flat at rest may become uncomfortable or visually distorted in a deep bend. Conversely, some seam texture may be intentional and acceptable if it matches the approved reference.
The brand should separate visual workmanship from functional durability. A visual check can document seam appearance on one sample. A durability claim needs a defined test plan, conditioning and acceptance criterion. If a panel is placed in a high-stress region, request the team to discuss whether an additional wear or wash review is appropriate. Avoid writing that a mesh panel will not fail unless the exact construction has supporting evidence.
Artwork and branding create their own panel constraints. A large print, heat transfer or embroidery can bridge an open mesh area, change the hand and appearance, or interfere with stretching. The artwork should be overlaid on the panel map before sampling. Confirm safe distances from seams and edges, orientation, scale and whether the brand wants the logo on mesh, main fabric or both. If the exact placement changes material behaviour, inspect it on the garment sample and add the branding process to the approval record.
How should you review stretch and recovery?
Stretch and recovery must be considered by direction and component. Mesh can stretch more in one direction than another; a body fabric may be four-way or primarily crosswise stretch; and the panel shape can concentrate extension at a curve. The pattern must account for that behaviour. Ask for the candidate direction marked on the fabric and confirm whether the panel is cut on the intended orientation. A cutting mistake can change fit and seam behaviour even when the correct fabric is used.
The buyer should define the relevant fit and movement checks rather than request a vague amount of stretch. For a fitted legging insert, observe whether the panel distorts, bags or shifts after wear and recovery. For an underarm area, review reach and rotation. For a loose top, movement may be less constrained but seam rippling may matter more. If a stretch or growth report is required, ask a laboratory to select a method that fits the exact textile construction. ASTM D3107, for example, applies to certain woven fabrics made with stretch yarns and specified extension conditions; it is not a universal method for every knit mesh. The official ASTM D3107 scope describes its boundary and cautions against using it as a commercial acceptance test.
Recovery is not established by one pull. If the project uses an internal observation, record specimen dimensions, direction, extension procedure, time held, recovery interval, measurement points and number of repeats. Keep results separate from lab testing. For a finished garment, note size, construction and wearer, because a fabric sample can recover differently from a seam-constrained panel. The purpose of this discipline is to make the next decision repeatable, not to make an informal check look like a standard.
How do logos, colour and wash change a mesh decision?
Colour joins deserve deliberate review. A dark mesh beside a pale body fabric may create a strong visual contrast; the same mesh in a lighter shade could change coverage expectations. Dye lots can vary, and different constructions may accept colour differently. Confirm the intended shade references for each component and review them next to each other under the agreed light source. For more context on how knit and fabric surface affect colour appearance, read the activewear colour and fabric guide.
Branding on mesh needs an actual process check. A transfer can bridge holes; embroidery can add stiffness; print can change the open visual texture. Ask which decoration method is proposed, whether the artwork can be adjusted, and which sample will represent the production method. A buyer should approve the decorated garment, not infer the result from a logo mockup. If private-label labels, packing or multiple colourways are part of the programme, map those details into the same approval flow so they do not arrive after the mesh construction is signed off.
Care can alter appearance and dimensions. Ask what wash instructions the finished garment should carry and test a sample under that exact intended process if care performance is material to approval. Review the mesh, adjacent fabric, thread and seam together after washing. Note twist, shrinkage, seam puckering, surface change, colour difference and any change in coverage. One home wash observation is not a guarantee of long-term durability. A buyer who needs a formal claim should use an agreed test method and acceptance rule, then retain the report with the approved product version.
How do catalogue references fit a factory-custom project?
A catalogue style can help a team describe intended use, silhouette or construction direction. For example, the DWY115002 yoga activewear reference and DWY115022 yoga activewear reference may help the buyer point to a garment or panel concept. The live product pages are reference destinations; they do not establish that a particular mesh composition, panel percentage, seam or current BOM is available. Confirm those details against a current sample and material record.
If the requested panel changes the body map, material, grading or construction, use the custom activewear development route. A factory brief should include the intended product, reference code, target fit, sizes, panel flat, material roles, colour, lining, seam expectation, decoration and wash question. The team can then clarify which parts are existing references and which need development. A logo-only private-label request may fit an existing-style route; a new mesh zone or changed pattern generally needs a project-specific sample scope.
The activewear wash-sample brief helps keep the post-wash question attached to an identified product version. The related fabric-selection guide explains how to compare composition, knit, weight, stretch and colour before a sample is commissioned. These guides do not replace a supplier specification or lab report; they help a buyer arrive with a decision-ready brief.
What should a buyer include in a mesh-panel brief?
A useful brief gives the factory enough context to make a relevant sample and makes unknowns visible. Include one product role and one central decision. If the project asks the supplier simultaneously to optimize airflow, compressive support, coverage, colour, cost, wash durability and decoration, the team cannot tell which trade-off should lead. Rank requirements as must-have, preference or open question. Identify who approves each one.
| Brief field | What to provide | Why it matters |
|---|---|---|
| Garment identity | Style reference, garment type, fit, target size range and use | Keeps the review tied to one product and grading context |
| Panel map | Front/back flats, zones, dimensions, seam lines and placement tolerances | Prevents vague placement interpretation |
| Material pair | Main body and mesh IDs, supplied composition, construction, weight and colour | Makes the comparison traceable; leaves missing data visible |
| Coverage | Target wearer, base layer, light, movement and approval owner | Defines what coverage means for this project |
| Stretch and seam | Direction, movement, seam appearance, recovery concern and stress location | Identifies where the assembly needs attention |
| Branding | Artwork, method, location, scale, colour and label details | Shows which areas may be covered or stiffened |
| Care | Intended care label and agreed sample wash procedure | Allows post-care observations to match the product plan |
| Evidence | Supplier documents, lab report, observation or open question | Prevents a visual impression from being presented as a test |
| Route and quantity | Wholesale reference plus light branding or custom development context | Helps frame the right commercial conversation without assuming a fixed MOQ |
Before a sample starts, attach the current artwork and technical flat, date the material references, and state what will count as an approval or revision. Ask the factory to flag any proposed substitute before it is used. If a substitute affects stretch, coverage or seam behaviour, it needs the same review as the original. The person who approves the sample should receive the supporting notes, not only a status marked approved.
How can a brand make a fair sample decision?
Review the sample against the brief in a fixed order. First confirm identity: size, material, colour, panel location and construction match the approved version. Then check relaxed appearance and measurements. Next perform the named movements and review coverage, seam distortion and logo placement. Finally follow the agreed care observation, if one is part of the sample plan. This order helps the team identify whether a mismatch is a material, pattern, sewing or approval issue.
Record each finding as a fact, not a conclusion beyond the evidence. For example: panel edge shows visible waviness after the named arm raise in size M is more useful than mesh quality is poor. Include a photo when it clarifies the location, but keep the unedited original and add date, lighting and sample version. A photo cannot prove airflow, fibre composition or wash durability. If reviewers disagree, state the disagreement and have the decision owner resolve it before the next version.
When the sample passes the project’s stated requirements, preserve it as the visual and construction reference for any later production discussion. Record approved materials, seams, artwork, care details and acceptable tolerances. If the buyer changes a colour, size range, mesh supplier or panel width, identify which checks must be repeated. A changed input can invalidate an earlier observation, so the approval record should describe the version it covers.
For teams developing a new collection, the custom activewear page describes the route for a project-specific product brief. For an existing reference where the scope is primarily a logo, labels or packing, buyers can describe the desired wholesale presentation through the private-label service. In either case, exact materials, timing, price and production conditions depend on the confirmed project scope.
Buyer checklist before requesting a quote or sample
- Identify the garment, use, wearer, size range and fit reference.
- Draw every proposed panel on a front and back flat; label dimensions and joins.
- Separate visual intent from functional requirements, and rank the must-haves.
- Name the mesh and main-body material candidates where known; label missing specifications as pending.
- Confirm stretch direction, lining, intended coverage and review conditions.
- Mark logo, print, embroidery, labels, trims and any area they cover.
- Specify the wash route and the observations or tests that matter after care.
- Request a sample that represents the actual material pair and sewing construction.
- Keep supplier claims, lab results, photos and wearer comments in separate evidence fields.
- Define approval owners and the decision that would trigger a revision.
This preparation reduces interpretation gaps. It does not guarantee a particular performance outcome or production schedule. It gives the buyer and factory a common basis for deciding whether to refine a reference garment or create a new development sample.
Share a panel map and sample brief
Send the garment reference, intended wearer, front/back panel flat, mesh and main-body material records, target colours, coverage and movement checks, logo placement, wash questions and first-sample decision through inPACE’s contact page. If a new panel requires a changed fit or construction, identify it as a custom activewear project. inPACE can review the brief and confirm the appropriate sampling discussion; material availability, test scope, timing, price and production conditions are project-specific.
What to review
Questions designers, buyers, and brands should answer
Activewear brands, fitness chains, product managers and B2B buyers deciding where mesh belongs in a garment and how to review the assembled sample.
Map each proposed panel to a wearer need, garment zone, adjoining fabric and seam.
Review coverage, stretch, branding and care on the actual garment rather than infer results from a product photograph.
Treat product codes as style references until the current BOM and material records are confirmed.
Practical next step
Turn the research into a clearer product brief
Share the garment reference, panel map, material candidates, target coverage, logo locations and sample questions for a custom-development review.
View the order processProduct directions
Explore relevant activewear products
Use these product pages as practical references for your brief, then confirm materials, fit, customization, and production details through sampling.
DWY115002 Yoga Activewear Reference
Use this garment direction to mark the target panel zone, then confirm the current material, BOM and seam in a sample.
View product directionDWY115022 Yoga Activewear Reference
Compare a second style reference for panel, coverage and fit questions; the product page is not a fabric specification.
View product directionCustom Activewear Development
Use factory development when the panel map, fabric combination, fit or seam construction changes.
View product directionFAQ
Buyer questions
Do mesh panels always improve ventilation?
No. An open construction may allow more air through the fabric in a defined comparison, but the garment-level experience depends on placement, fit, layering, movement, climate and surrounding materials. If airflow is a purchase requirement, define the intended comparison and ask a qualified lab about an appropriate test.
Is power mesh the same as ventilating mesh?
No. The names may describe different structures and functions. Power mesh is commonly selected for support or hold in a specific garment role, while an open mesh may be selected for appearance or airflow. Confirm the actual material construction and intended function rather than relying on a label.
Can a product photo confirm the mesh used in a style?
No. A photo can identify a visual reference, but it does not confirm the current bill of materials, composition, panel share or supplier. Request current product and material details for the exact version that would be sampled.
How do I check whether mesh is opaque enough?
Review the actual sample in its intended colour, size, stretch, lighting, movement and layering conditions. A flat swatch may be useful for screening, but it cannot settle every on-body coverage question. The brand should define and approve its own criterion.
Can a logo be placed over mesh?
Possibly, depending on the artwork, material, process and intended appearance. Print, transfer and embroidery can cover openings or change hand and stretch. Approve the decoration on a representative garment sample.
What test proves mesh breathability?
There is no single test that proves whole-garment comfort for every use. ASTM D737 measures air permeability of textile fabrics under specified conditions. Ask a lab to confirm whether the method suits the exact fabric or assembly, and keep the result within its stated scope.
Does a sample wash prove long-term durability?
No. A project wash review can reveal changes after the named care procedure, but it does not establish performance through every use or number of cycles. Formal durability claims require an agreed method and suitable evidence.
When should a mesh-panel project use custom manufacturing?
Use a custom-development discussion when the brief changes fit, panel shape, material pairing, seam construction, lining or functional objective. An existing catalogue page can provide a reference, while the required garment and its details still need confirmation.